Download Face_Poser_Tutorial.zip
Face Poser Tutorial for Team Fortress 2
by [MLW]Maj. Cottonmouth
This is a simple tutorial to introduce you to using the Face Poser tools with the Team Fortress 2 game engine. There
are some tools you will need to have to get started. You must be using Windows XP or earlier because the Microsoft
Speech SDK 5.1 does not support Vista and it is required. Download and install the Microsoft Speech SDK 5.1, click
the link below and scroll the bottom of the page, SpeechSDK51.exe is the one you want. You will need to extract the
files to a folder and then run setup.
You will need a program to create and edit audio files when creating your own machinima and I recommend Audacity
which is available for free from http://audacity.sourceforge.net/.
For the purposes of this tutorial we will use a sound file I recorded from a public domain video off of the
Prelinger Archives, they have tons of cool old videos, check it out.
Audio file *Note - Audio files must be of the following format to work correctly in Face Poser
22050bps 11/22/44kHz 8/16 Bit PCM WAV
This tutorial also assumes you own Team Fortress 2 as we will be using models from that game.
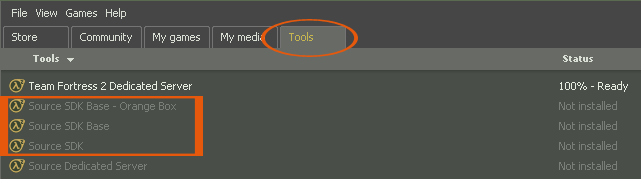
Open Steam and select the Tools tab. Make sure that the Source SDK, Source SDK Base and Source SDK
Base - Orange Box are installed. Right click each one that is not installed and select Install Game... Click Next twice
and then click Finish for each one that needs to be installed.
You must run the game that you plan to use the models from once before running the SDK or you will get an error
about missing configuration files. In our case we need to launch Team Fortress 2. After the game completes loading
hit Esc and select Quit.
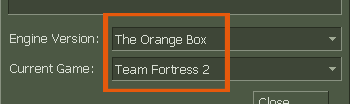
Open Steam and select the Tools tab and double click on Source SDK, this will open the SDK window.
Select The Orange Box for Engine Version and Team Fortress 2 for Current Game at the bottom of the SDK window.
Double click Face Poser in the Source SDK window to open the application.
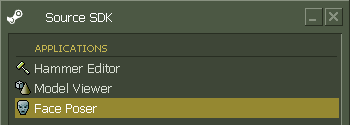
This will open Face Poser, your screen will look different because I have rearranged the windows I use in Face Poser.

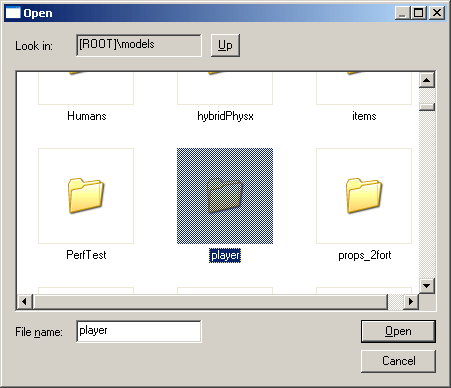
You will need to load a model to work with and can select any TF2 model you like.
Select File Load Model... then double click the player folder then double click the .mdl you want to use and it will load
in the 3D View window.
You can quickly open and close windows in Face Poser by double clicking the tabs along the bottom of the screen.
Open the Phoneme editor by double clicking its tab.
![]()
To get started we will need to copy the example wav file to the directory that Face Poser will be looking in.
By default this will be located at C:\Program Files\Steam\SteamApps\YOURUSERNAME\team fortress 2\tf\sound
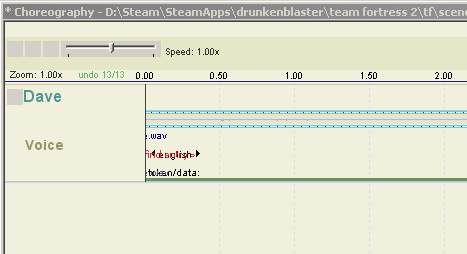
Once the WAV file is copied to the TF sound folder we can load this audio file into the Phoneme Editor, click the
Load button at the bottom of the Phoneme Editor window.

This will open a browse window, select the date.wav file and click the Open button.

The wav file will load in the Phoneme Editor window and display the waveform of the file, click the Re-extract button.
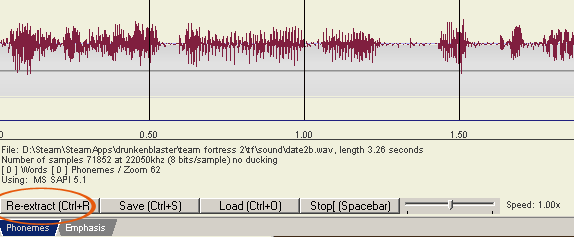
This will open the Word List box, enter what is said in the wav file into this box and click OK.
In this case it is "this is a story about what to do on a date"
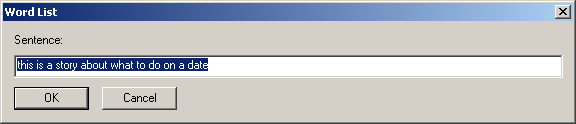
You should get green text telling you that the extraction was successful. If you do not have the Microsoft
Speech SDK 5.1 installed the extraction will always fail at this point. Yellow text indicates a partial
extraction and red text indicates a failed extraction.
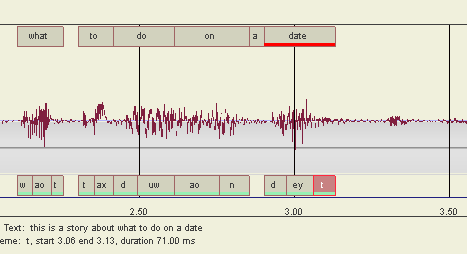
The Phoneme editor will now display the text you entered at the top, below that is the text aligned with the phonemes
and at the bottom are the phonemes.
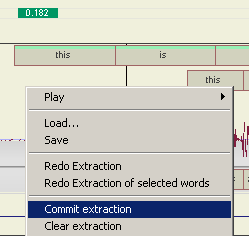
Right click in the Phoneme editor and select Commit extraction
You can now play the file and see the model lip sync the words and it did a very good job
but the model closes his mouth before the t sound from date is completed. You can better
see this if you set the speed slider to 0.35x and then play the file.

Click the t phoneme for the word date.
Hold the Ctrl key and mouse over the right end of the t phoneme then click and drag the phoneme to be longer.
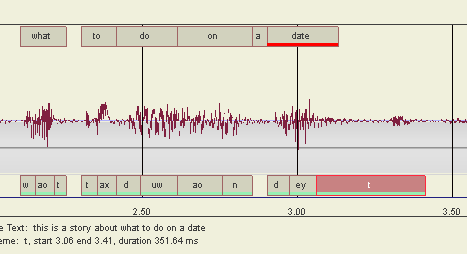
Now play the file and you should notice the added emphasis of the phoneme t but now it is too long and the ey should
last longer. Hold the Ctrl key and mouse over the line between the ey and t phonemes and make the t phoneme
smaller and the ey phoneme bigger and then make the t phoneme shorter on the right end. Mine looks like this.

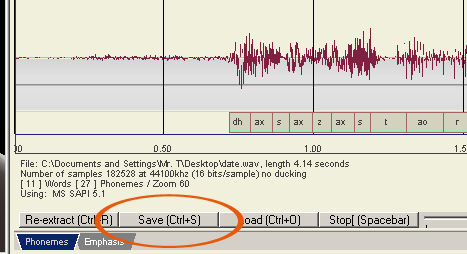
Click Save at the bottom of the Phonemes editor and we are ready to add our audio to a Choreography
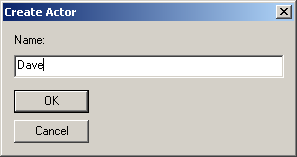
Click Choreography from the menu and select New... In the File Name box enter Date and click OK and
you will be prompted to enter a name for your Actor, you can name him anything you like but you will need
to know what name you used later. For our example we will use Dave. Enter Dave in the box and click OK.
Open the Choreography window using the Choreography tab at the bottom of the Face Poser Window.
![]()
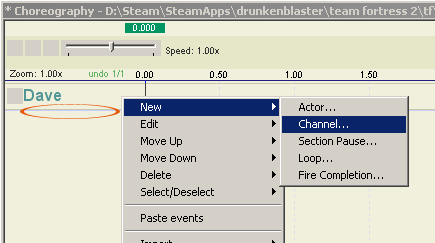
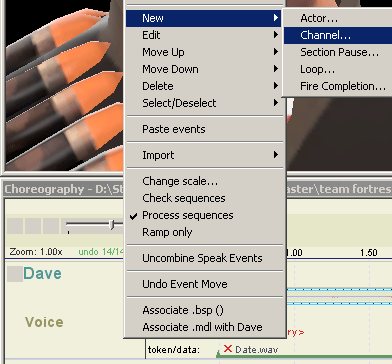
You will now see Dave the Actor we added to our choreography. Right click in the box around Dave and select
New > Channel... (you must right click above the line below Dave or you will get a different menu)
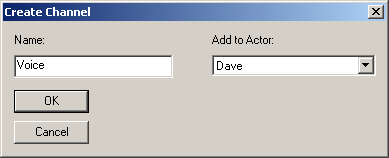
Enter Voice in the Name box and click OK, this is channel we will add the audio to.
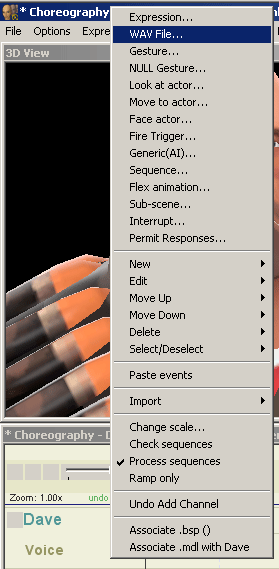
You can see that a channel named Voice has been added to Actor Dave. Right click next to Voice and select WAV
File...
Type Date.wav in the Sound box and click OK. The file will not appear in the list unless you have created a script and
that is way beyond the scope or point of this tutorial. You must have placed the wav file into the directory mentioned
before. C:\Program Files\Steam\SteamApps\YOURUSERNAME\team fortress 2\tf\sound.

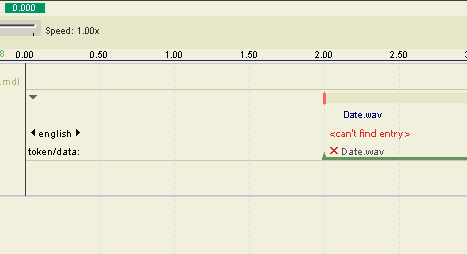
This will insert the WAV file at the point where you right clicked so as in my example it will be before the 0.00 time
mark.
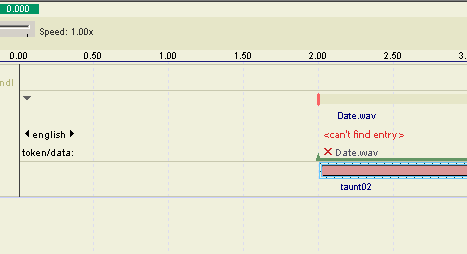
Click on Date.wav and drag it to the right to align it with the 2.00 time mark, we will need this time gap when playing
the vcd file in game.
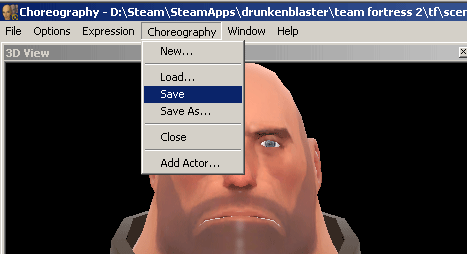
It would be a good idea to save our progress at this point, select Choreography from the menu and
click Save.
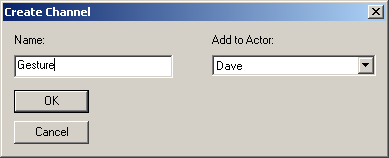
Let's add another channel so we can add a gesture. Right click next to Dave and select New > Channel...
Type Gesture in the Name box and click OK.
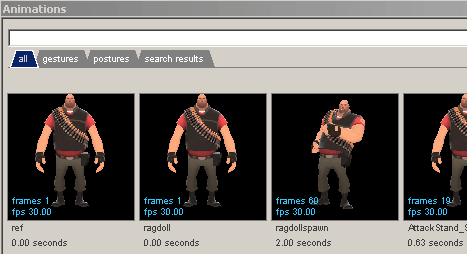
Open the Animations window by double clicking the Animation tab at the bottom of the Face Poser window.
![]()
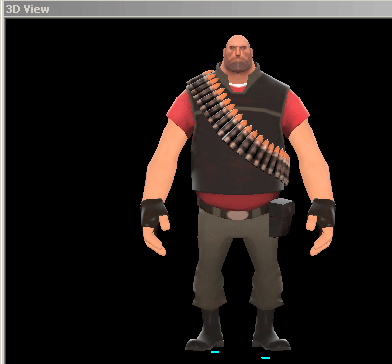
To see the animation mouse over it and left click and hold and the animation will play in the 3D View window.
You may need to change the view in the 3D View window to see the animation. Select Options from the menu and click
on Center View.

This will center the view on the model, right click in the 3D View window and drag down until you can see the entire
model. You will have to click and drag several times.
In the Animations window select taunt02 and drag it to the Gestures channel in your Choreography.
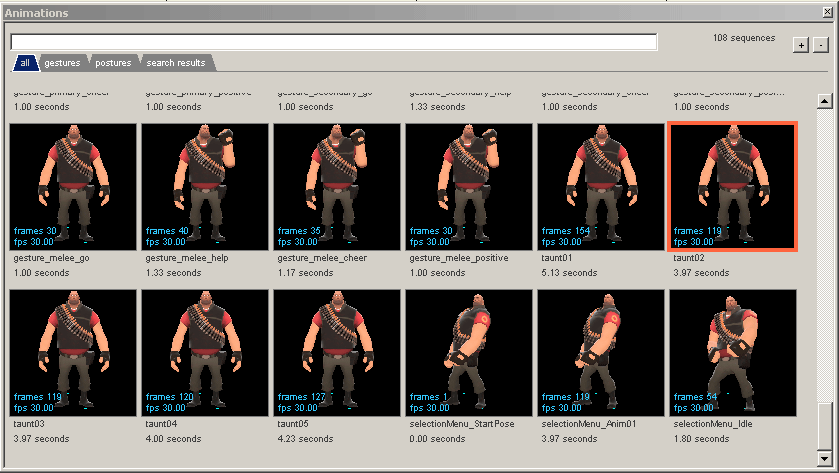
Type of event defaults to gesture so just click OK.
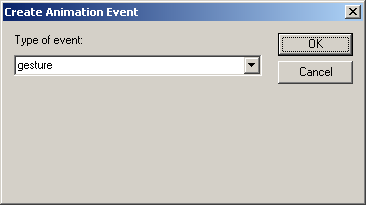
If you were to use multiple gestures it could be helpful to name them but we do not need to do this so just click OK.
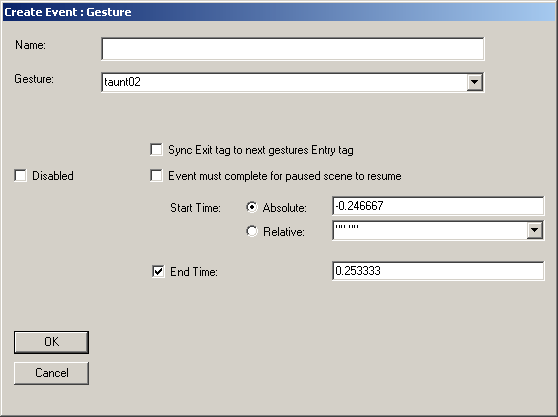
The gesture is added to the Choreography time line, click and drag it so it is lined up to start at the same time as
Date.wav.
We are done with the Face Poser part so we need to save again, select Choreography from the menu and click Save.
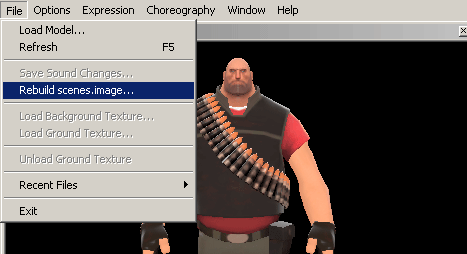
You must also be sure to rebuild the scenes.image file or it will not work in game.
To see the file played with the gesture click the play button in the Choreography window.
For some reason the play button does not display, it is the circled one.

Now to record your scene we must go into the game and run our Date.vcd file.
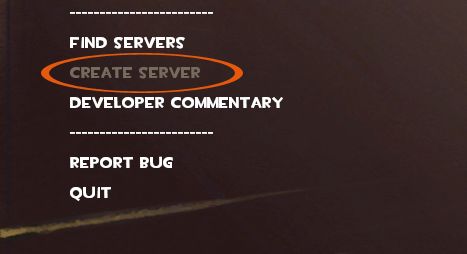
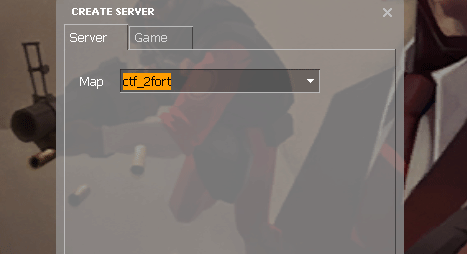
Launch Team Fortress 2 and select Create Server.
You can use any map you like, I am using 2Fort.
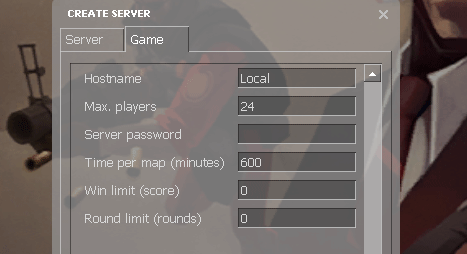
Here are the settings I used on the Game tab. Click the Start button.
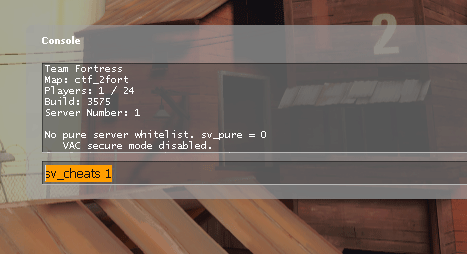
Once the map has loaded select team Red and pick any class. You will need to open the Console by hitting the ~ key.
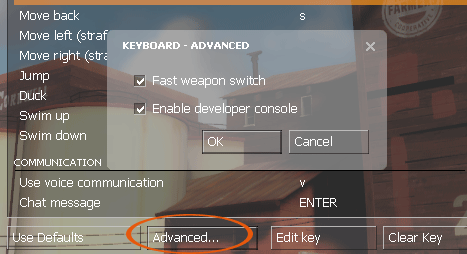
If you have not enabled the Console you will need to do so by selecting Options from the main menu and click the
Advanced button. Check the Enable developer console box.
With the console open type "sv_cheats 1" (without quotes) and hit the enter key to enable cheats on the server.
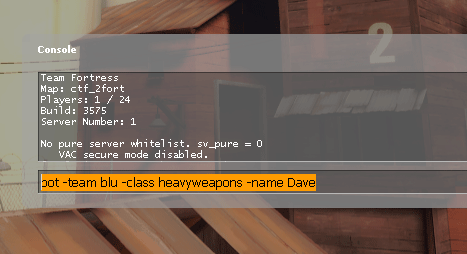
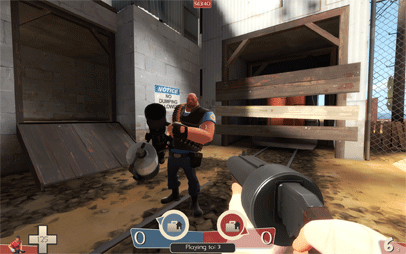
Now we need to spawn a bot, type "bot -team blu -class heavyweapons -name Dave" in the console and hit enter.
Dave is in the game but we need to get him to a place where we can see him. Close the console by hitting ~ again
and walk to the location you want to have Dave stand. Once you are at the location and facing the direction you want
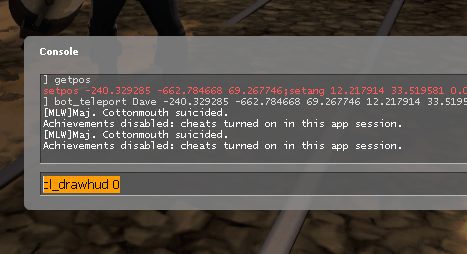
hit ~ to open the console and type "getpos" and hit enter.

This will list your current coordinates in the console. Highlight as I have and hold your Ctrl key and hit c. Close the
console and move or you will be stuck inside Dave.
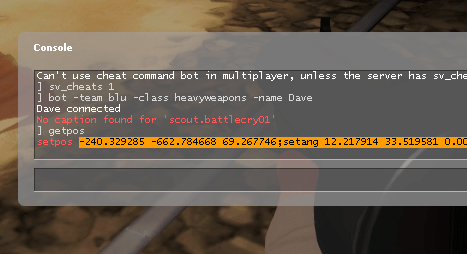
This will copy "-240.329285 -662.784668 69.267746;setang 12.217914 33.519581 0.000000" to your clipboard.
Type "bot_teleport Dave" into the console and then hold your Ctrl key and hit v, this will paste the location
information we copied ealier but we need to delete the ;setang part.
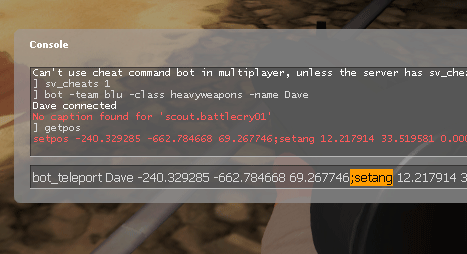
After deleting ;setang hit enter and Dave will appear where you were standing.
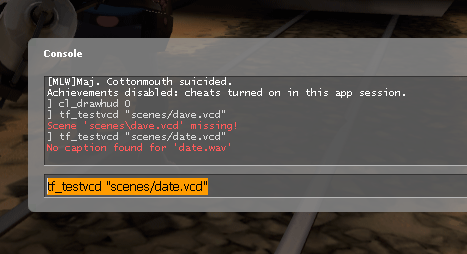
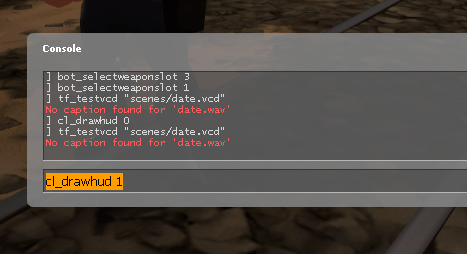
If you want to view your vcd without the hud on use the command "cl_drawhud 0"
To run the vcd file enter "tf_testvcd "scenes/date.vcd""(inner quotes are needed) in the console and hit enter.
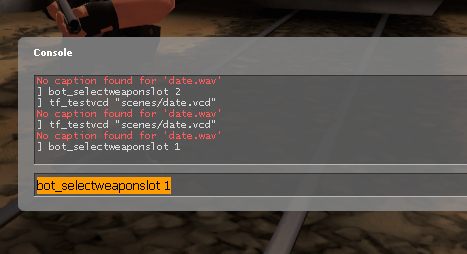
It works but the gesture looks weird because he is holding the wrong weapon, luckily we can change the weapon the
bot is holding by entering "bot_selectweaponslot 1" into the console and hit enter. This will change the heavy to his
shotgun which is the correct weapon for the gesture.
You will want to enter "cl_drawhud 1" into the console and hit enter so you can see the menu once you are done.
Well that is about it, if you want to record your vcd you can use Fraps or WeGame
Download Face_Poser_Tutorial.zip